
Starting your composting journey might feel overwhelming at first, but composting at home for beginners is actually much simpler than you think! Whether you have a sprawling backyard or just a small apartment balcony, you can turn your kitchen scraps and yard waste into nutrient-rich “black gold” for your plants. This beginner-friendly guide will walk you through everything you need to know to start composting successfully, save money on fertilizer, and reduce your household waste by up to 30%.
Composting is essentially nature’s recycling system – and once you understand the basics, you’ll wonder why you waited so long to start. Let’s dive into this rewarding journey that benefits both your garden and the environment.
Table of Contents
What Is Composting and Why Should You Start?
Composting is the natural process of decomposition that transforms organic waste into a dark, crumbly soil amendment called compost. When you begin Composting at Home for Beginners, you simply create the right conditions so beneficial microorganisms break down materials like fruit peels, coffee grounds, and fallen leaves into nutrient-rich humus that plants absolutely love. This beginner-friendly method fits perfectly with Easy Composting Methods and Home Composting Tips that help you turn kitchen scraps into healthy soil.
The benefits of composting extend far beyond just creating fertilizer. By following a simple Beginner Compost Guide, you’ll dramatically reduce the amount of waste your household sends to landfills, where organic matter produces harmful methane gas. Instead, you’re creating something valuable and eco-friendly, a process often called Eco-Friendly Composting, that improves soil structure, retains moisture, and slowly releases nutrients to feed your plants throughout the growing season.
Understanding the Science: What Makes Compost Work
Before diving into Composting at Home for Beginners, it helps to understand the simple science behind the process. All effective compost systems — especially those following Home Composting Tips and Easy Composting Methods — rely on four key elements that work together naturally.
First, every Beginner Compost Guide highlights the importance of balancing carbon-rich “brown” materials with nitrogen-rich “green” materials. Browns include dried leaves, newspaper, and cardboard, while greens include kitchen scraps like vegetable peels, coffee grounds, and fresh grass clippings. The ideal ratio is about 3 parts brown to 1 part green, though you don’t need to be perfectly precise when composting at home for beginners.
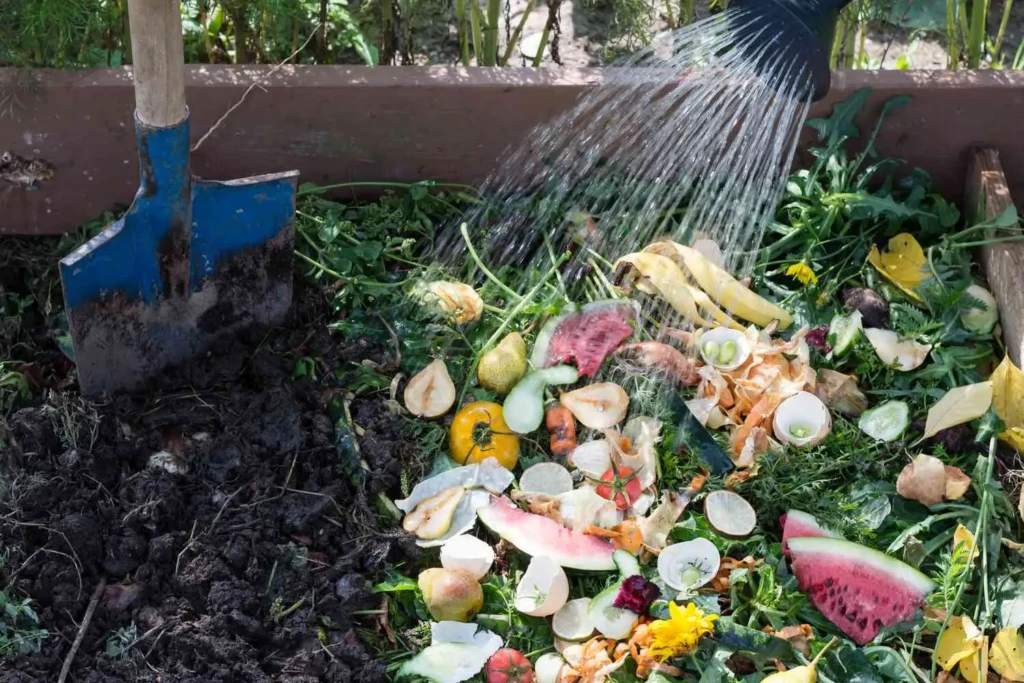
Second, moisture matters. Your pile should feel like a wrung-out sponge. If it’s too dry, decomposition slows; if it’s too wet, you risk creating anaerobic conditions that cause bad odors instead of the rich compost valued in Eco-Friendly Composting.
Third, oxygen is essential. Turning or mixing the pile allows air to flow and supports the beneficial aerobic bacteria responsible for proper decomposition. This prevents the smelly, anaerobic breakdown that often discourages people from Composting at Home for Beginners.
Finally, temperature plays a crucial role. A well-maintained compost pile naturally heats up to around 130–160°F. This heat speeds up decomposition and kills harmful pathogens and weed seeds — a core principle in most Home Composting Tips and Easy Composting Methods.
Getting Started: Choosing Your Composting Method
The beauty of composting at home for beginners is that you have multiple options to choose from, depending on your space, budget, and lifestyle. Each method has its advantages, so pick the one that fits your situation best.
Traditional Compost Bins are perfect for most homeowners with yard space. You can purchase a ready-made bin or build one from pallets, chicken wire, or lumber. These contained systems keep your compost tidy while providing good airflow and easy access for turning.
Indoor Composting Options work great for apartment dwellers or those with limited outdoor space. Vermicomposting (worm composting) thrives indoors and produces exceptional compost, while electric composters can process kitchen scraps right on your countertop.
Essential Kitchen Scraps for Compost: What to Include
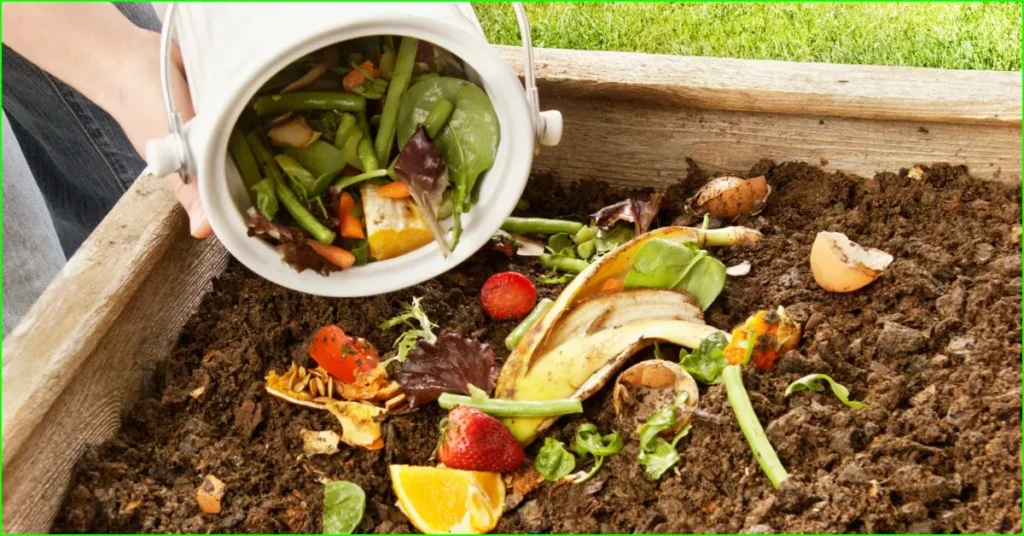
Understanding which kitchen scraps for compost will supercharge your pile is crucial for success. The good news is that most of what you typically throw away can actually become valuable compost ingredients.
Fruit and vegetable scraps form the backbone of most home compost piles. Apple cores, banana peels, citrus rinds, potato skins, lettuce leaves, and carrot tops all decompose beautifully. Don’t worry about removing stickers from produce – they’ll either decompose or can be easily picked out of finished compost.
Paper products like napkins, paper towels, and shredded newspaper provide valuable carbon. Even pizza boxes can be composted if you tear them into smaller pieces and remove any plastic coating.
What NOT to Compost: Avoiding Common Mistakes
When practicing Composting at Home for Beginners, understanding what not to add to your pile is just as important as knowing what belongs in it. Many Home Composting Tips emphasize avoiding certain materials because they cause bad odors, attract pests, or simply don’t break down well in a residential system — even when following Easy Composting Methods.
Meat, fish, bones, and dairy products are among the biggest offenders. They decompose slowly, produce strong smells, and can attract rodents and flies to your compost area. Any Beginner Compost Guide will recommend keeping these out of a basic home pile. If you’re determined to compost them, a specialized bokashi system is a safer, more controlled option designed for complex food waste.
You should also avoid materials like treated lumber, glossy magazines, or anything with synthetic coatings. These items don’t decompose properly and may introduce chemicals into your compost. For truly Eco-Friendly Composting, stick to natural, unprocessed materials that break down cleanly and safely.
Setting Up Your First Compost Bin: Step-by-Step Instructions
Now that you understand the basics of Composting at Home for Beginners, it’s time to set up your first compost system. Following these simple steps — inspired by proven Home Composting Tips and Easy Composting Methods — will help you achieve successful composting results within your first week.
Start by choosing a location that’s convenient to your kitchen but not too close to windows or outdoor living areas, especially while you’re still learning. Partial shade is ideal: full sun can dry your pile too quickly, while deep shade may slow decomposition. This balance is emphasized in every Beginner Compost Guide.
If you’re using a store-bought compost bin, follow the manufacturer’s assembly instructions carefully. For a DIY option, create a basic three-sided enclosure using pallets, wooden boards, or chicken wire attached to sturdy posts. Leave the front open — or make it removable — so that turning and accessing the compost is easy. This simple setup aligns perfectly with Eco-Friendly Composting and gives beginners a flexible, low-cost way to get started.
The Perfect Recipe: Layering Your Compost Materials
Creating successful compost is like following a flexible recipe – you want the right proportions, but there’s room for creativity and adaptation based on what materials you have available.
Start each new addition to your pile with a layer of browns. This helps prevent odors and creates the carbon base that feeds composting microorganisms. Shredded newspaper, dried leaves, or small pieces of cardboard work perfectly for this foundation layer.
Add your kitchen scraps for compost in thin layers rather than dumping everything in one spot. Large clumps of the same material don’t decompose evenly and can create anaerobic pockets that smell bad. Spread things out and mix different types of scraps together.
Cover each addition of greens with browns, using roughly three times as much brown material by volume. This ratio isn’t set in stone – if your pile seems too wet and smelly, add more browns. If it’s not heating up or decomposing slowly, try adding more green materials.
Water your pile lightly if materials seem dry, but don’t soak it. The moisture should feel like a damp sponge when you squeeze a handful of compost. Many beginners underwater their piles, especially during dry weather, which significantly slows decomposition.
Maintaining Your Compost: Turning and Troubleshooting
Regular maintenance transforms a slow, potentially smelly pile into an efficient composting machine. The good news is that maintenance becomes second nature once you establish a routine.
Turning your pile every 2-4 weeks introduces oxygen and mixes materials for even decomposition. Use a pitchfork or shovel to move outside materials toward the center and bring center materials to the outside. If you’re using a tumbler, simply give it several good spins.
Monitor the temperature by sticking your hand into the center of the pile (carefully – it can get quite hot!). A warm to hot center indicates active decomposition, while a cool pile suggests you need to adjust the carbon-nitrogen balance or add moisture.
During the growing season, your pile should progress through predictable stages. Initially, it will heat up and steam slightly as bacteria multiply rapidly. After several weeks, it will cool down as different microorganisms take over. Finally, earthworms will move in to finish the process, creating the dark, crumbly finished product.
Troubleshooting Common Beginner Problems
Even experienced composters encounter occasional challenges, so don’t get discouraged if your first attempts aren’t perfect. Most problems have simple solutions once you identify the underlying cause.
Strong, unpleasant odors usually indicate too much moisture and not enough air circulation. Add dry brown materials like shredded paper or dried leaves, and turn the pile to introduce oxygen. Avoid adding more kitchen scraps until the smell improves.
Slow decomposition often results from insufficient moisture, too much carbon, or lack of nitrogen. Water your pile lightly, add some fresh green materials like grass clippings or kitchen scraps, and ensure you’re turning regularly.
Home Compost Bin Tips for Faster Results
Once you’re comfortable with basic composting, these advanced home compost bin tips will help you produce finished compost more quickly and efficiently.
Chopping or shredding materials before adding them dramatically speeds decomposition. Banana peels break down in weeks when cut up, but can take months when added whole. The same principle applies to brown materials – shredded leaves decompose much faster than whole ones.
When Is Your Compost Ready? Signs of Success
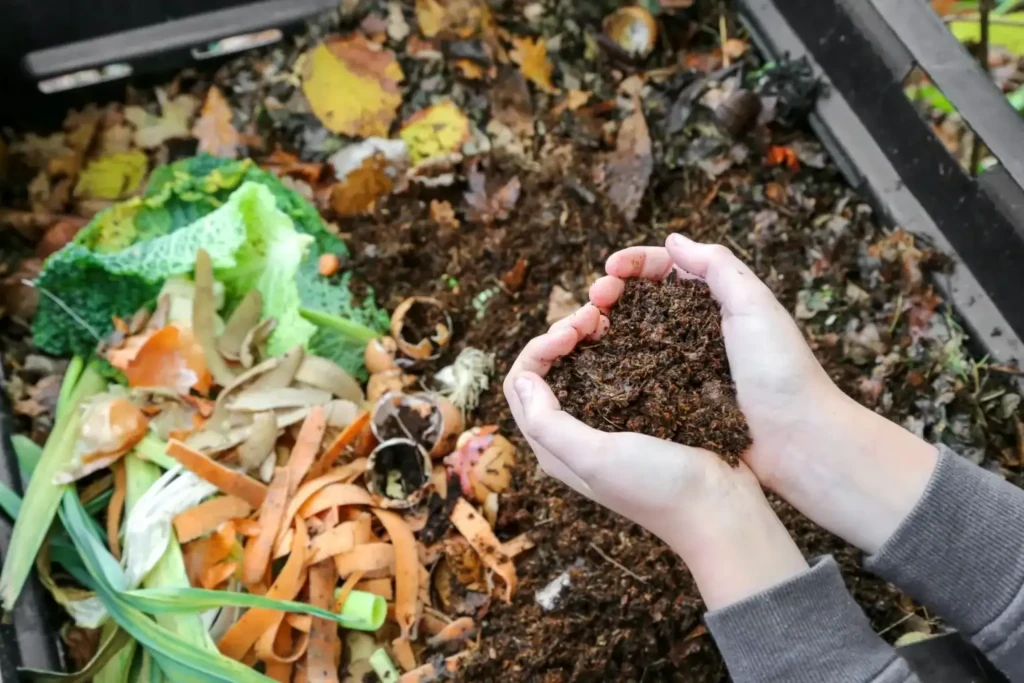
Knowing when your compost is finished is crucial for getting the best results in your garden. Finished compost has several distinctive characteristics that are easy to recognize once you know what to look for.
The most obvious sign is appearance – finished compost looks like dark, rich soil with a crumbly texture. You shouldn’t be able to identify individual ingredients except for occasional pieces that were slow to break down, like avocado pits or corn cobs.
The volume test is also helpful – finished compost will have shrunk to about one-third of its original size as materials decompose and compact. This dramatic reduction shows how efficiently composting converts waste into concentrated nutrients.
Using Your Finished Compost in the Garden
After months of patient composting, you’re finally ready to use your “black gold” in the garden. Proper application ensures you get maximum benefit from all your hard work.
For vegetable gardens, work 2-4 inches of finished compost into the soil before planting. This improves soil structure, adds slow-release nutrients, and helps retain moisture throughout the growing season. Your plants will show their appreciation with vigorous growth and better yields.
Lawn areas benefit from a thin layer of screened compost applied in fall or early spring. The nutrients improve grass health while beneficial microorganisms help break down thatch and improve soil structure naturally.
Seasonal Composting: Adapting Throughout the Year
Successful composting at home for beginners requires understanding how different seasons affect your pile and adjusting your approach accordingly.
Spring brings abundant green materials as you clean up winter damage and start gardening activities. Take advantage of fresh grass clippings and early weeds, but balance them with saved brown materials from fall. This is also an excellent time to start new piles with winter’s accumulated kitchen scraps.
Summer heat accelerates decomposition but can dry out piles quickly. Monitor moisture levels closely and provide shade if your bin is in full sun. The abundance of garden waste makes this peak composting season, but remember to maintain proper brown-green ratios.
Fall offers the best brown materials as leaves drop and garden plants finish their growing season. Collect and store extra leaves for use throughout winter and spring. This is also ideal for building large piles that will decompose over winter.
Winter composting slows down but doesn’t stop entirely. Continue adding kitchen scraps, but don’t expect rapid decomposition in cold climates. Consider insulating your pile with extra leaves or straw to maintain some biological activity.
Advanced Techniques: Taking Your Composting Further
Once you’ve mastered the basics, these advanced techniques can improve your results and expand your composting capabilities.
Hot composting involves building a large pile all at once and managing it intensively for rapid decomposition. When done correctly, you can have finished compost in 6-8 weeks rather than several months. This method requires more attention but produces excellent results.
Bokashi composting ferments kitchen scraps using beneficial microorganisms before traditional composting. This Japanese technique can handle materials like meat and dairy that are problematic in regular composting systems.
Creating a Sustainable Composting Routine
The key to long-term composting success is developing habits that make the process automatic and enjoyable rather than a chore.
Set up collection systems that make gathering materials effortless. Keep a small container on your kitchen counter for daily scraps, and designate areas for collecting browns like newspapers and cardboard. The easier you make collection, the more likely you’ll stick with composting long-term.
Schedule regular maintenance tasks like turning and watering just as you would other garden activities. Many successful composters choose one day per week for compost maintenance, making it part of their regular garden routine.
Your Composting Journey Starts Now
Composting at home for beginners doesn’t have to be intimidating or complicated. With the knowledge you’ve gained from this comprehensive guide, you’re ready to start transforming your kitchen scraps and yard waste into valuable garden gold.
Remember that composting is a forgiving process – nature has been decomposing organic matter for millions of years, and your pile will succeed even if you don’t follow every rule perfectly. Start with the basics, learn from experience, and don’t be afraid to experiment as you gain confidence.


